

How To Create A Shopping Cart Using Html
How To Create a Shopping Cart UI Using HTML & CSS?
Step by step tutorial
![]()
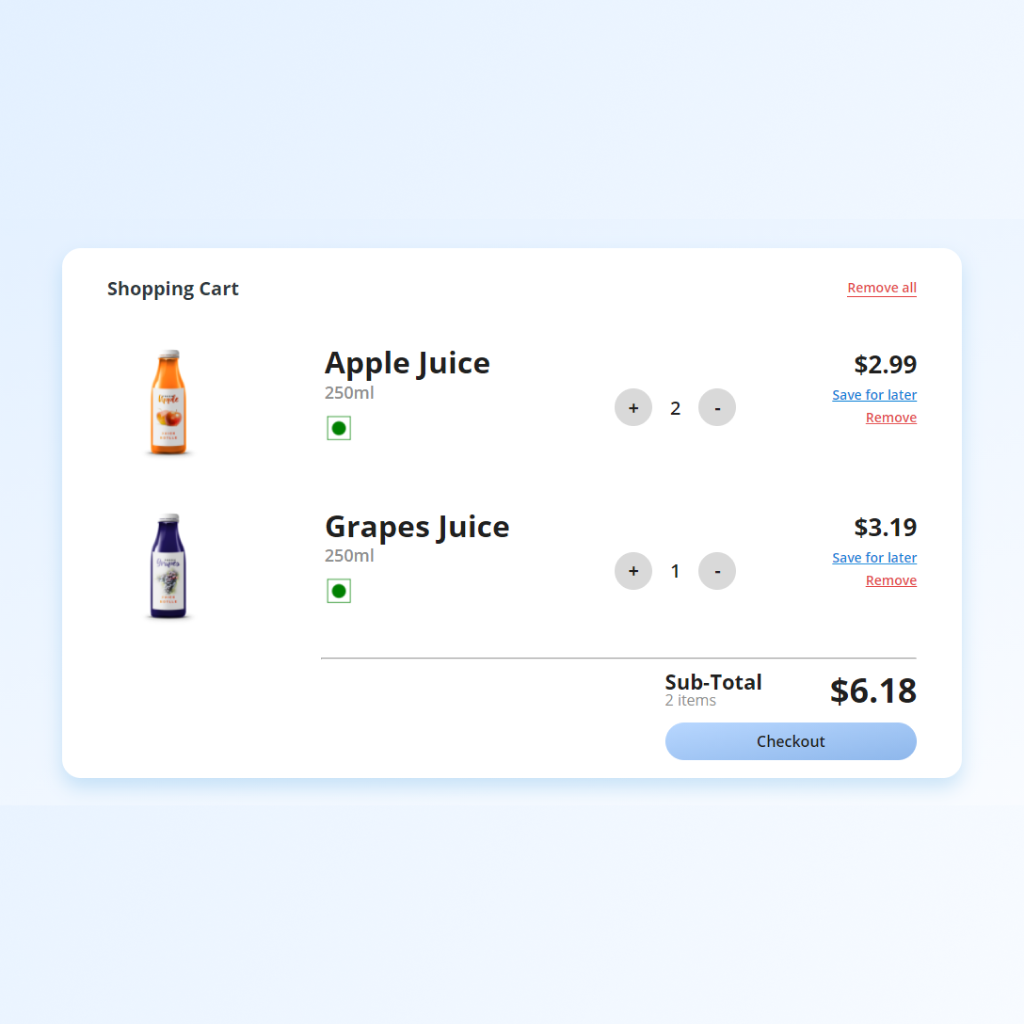
The shopping cart page is designed to allow buyers to see all the products they have added to the shopping cart. It contains a detailed list of products and their prices, and is the last stop before customers order and pay.
Think of the shopping cart page as this moment. Just before you check out. If you have a shopping list, now is the time to check it to make sure you have all the items you want to buy. You do not have a credit card. But you know that if everything goes according to plan, your next stop will be at the checkout.
Make Better User Experience:
- Allow the users to edit the number of items directly in the cart.
- If cart is empty, provide product recommendations.
- Allow the user to remove the product easily.
- Provide the clear view of the total price of the cart.
- Maintain proper visual hierarchy.
- Allow the user to empty the cart by one click.
Step 1: Creating a card
HTML:
            <body>
              <div class="Cart-Container"></div>
</body>
CSS:
            body{
              margin: 0;
              padding: 0;
              background: linear-gradient(to bottom right, #E3F0FF, #FAFCFF);
              height: 100vh;
              display: flex;
              justify-content: center;
              align-items: center;
}            .Cart-Container{
              width: 70%;
              height: 85%;
              background-color: #ffffff;
              border-radius: 20px;
              box-shadow: 0px 25px 40px #1687d933;
}
Preview:
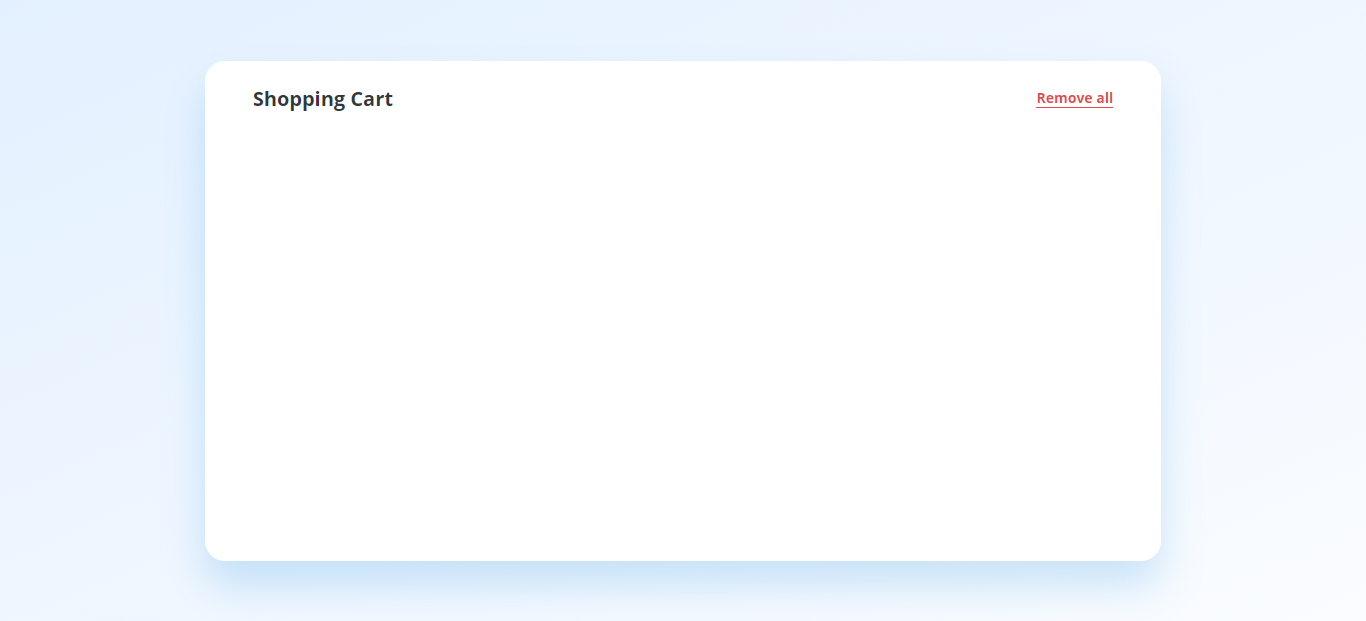
Step 2: Adding card header
HTML:
            <div class="Header">
              <h3 class="Heading">Shopping Cart</h3>
              <h5 class="Action">Remove all</h5>
              </div>
CSS:
            .Header{
              margin: auto;
              width: 90%;
              height: 15%;
              display: flex;
              justify-content: space-between;
              align-items: center;
}
.Heading{
              font-size: 20px;
              font-family: 'Open Sans';
              font-weight: 700;
              color: #2F3841;
}
.Action{
              font-size: 14px;
              font-family: 'Open Sans';
              font-weight: 600;
              color: #E44C4C;
              cursor: pointer;
              border-bottom: 1px solid #E44C4C;
}
Preview:
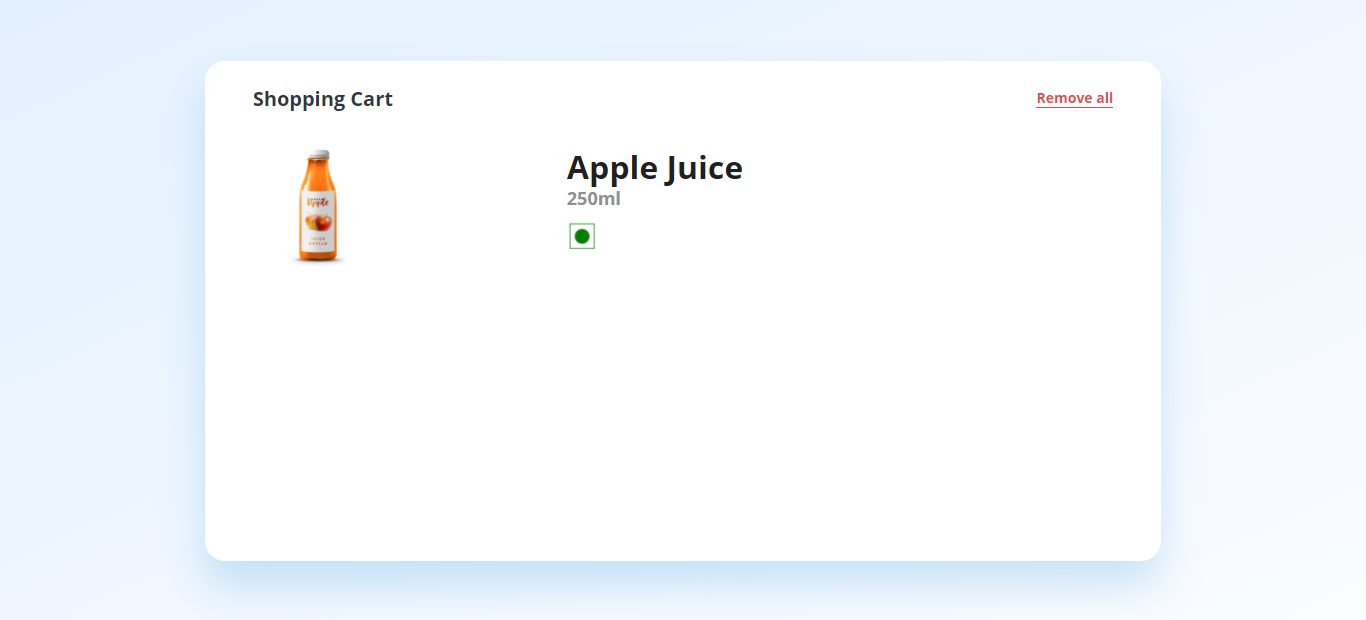
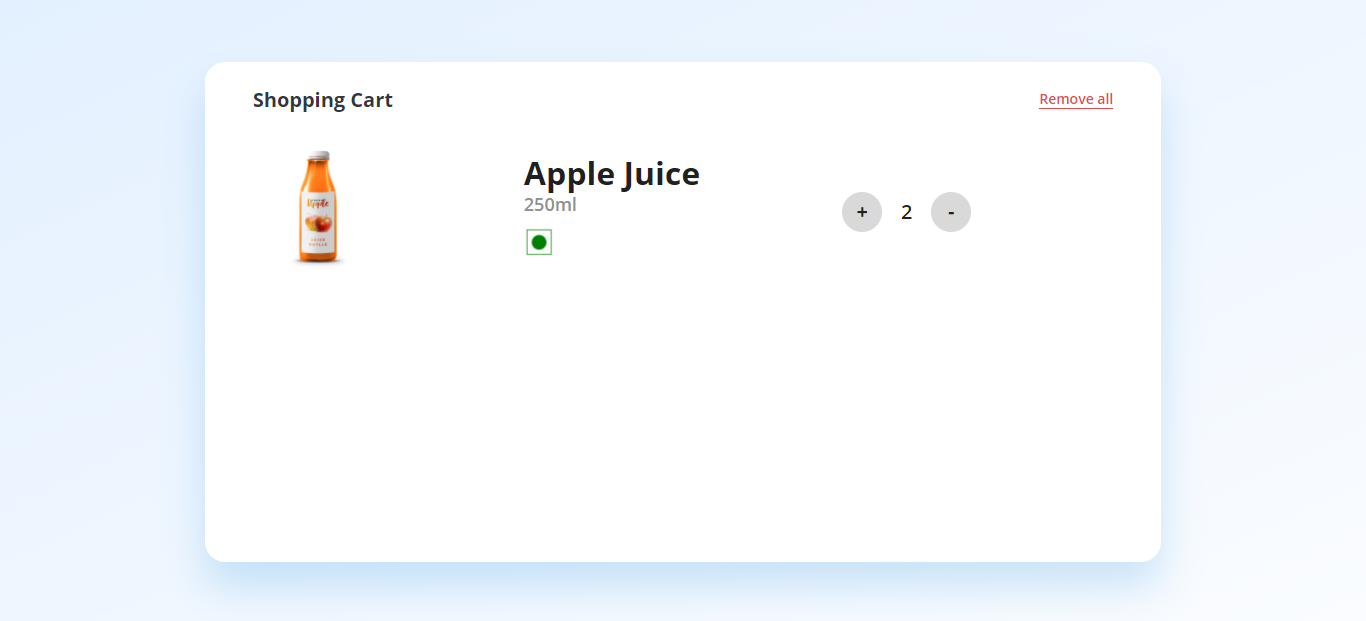
Step 3: Adding a product details
HTML:
            <div class="Cart-Items">
              <div class="image-box">
              <img src="images/apple.png" style={{ height="120px" }} />
              </div>
              <div class="about">
              <h1 class="title">Apple Juice</h1>
              <h3 class="subtitle">250ml</h3>
              <img src="images/veg.png" style={{ height="30px" }}/>
              </div>
              <div class="counter"></div>
              <div class="prices"></div>
              </div>
CSS:
            .Cart-Items{
              margin: auto;
              width: 90%;
              height: 30%;
              display: flex;
              justify-content: space-between;
              align-items: center;
}
.image-box{
              width: 15%;
              text-align: center;
}
.about{
              height: 100%;
}
.title{
              padding-top: 5px;
              line-height: 10px;
              font-size: 32px;
              font-family: 'Open Sans';
              font-weight: 800;
              color: #202020;
}
.subtitle{
              line-height: 10px;
              font-size: 18px;
              font-family: 'Open Sans';
              font-weight: 600;
              color: #909090;
}
Preview:
Step 4: Creating a counter
HTML:
            <div class="counter">
              <div class="btn">+</div>
              <div class="count">2</div>
              <div class="btn">-</div>
              </div>
CSS:
            .counter{
              width: 15%;
              display: flex;
              justify-content: space-between;
              align-items: center;
}
.btn{
              width: 40px;
              height: 40px;
              border-radius: 50%;
              background-color: #d9d9d9;
              display: flex;
              justify-content: center;
              align-items: center;
              font-size: 20px;
              font-family: 'Open Sans';
              font-weight: 900;
              color: #202020;
              cursor: pointer;
}
.count{
              font-size: 20px;
              font-family: 'Open Sans';
              font-weight: 900;
              color: #202020;
}
Preview:
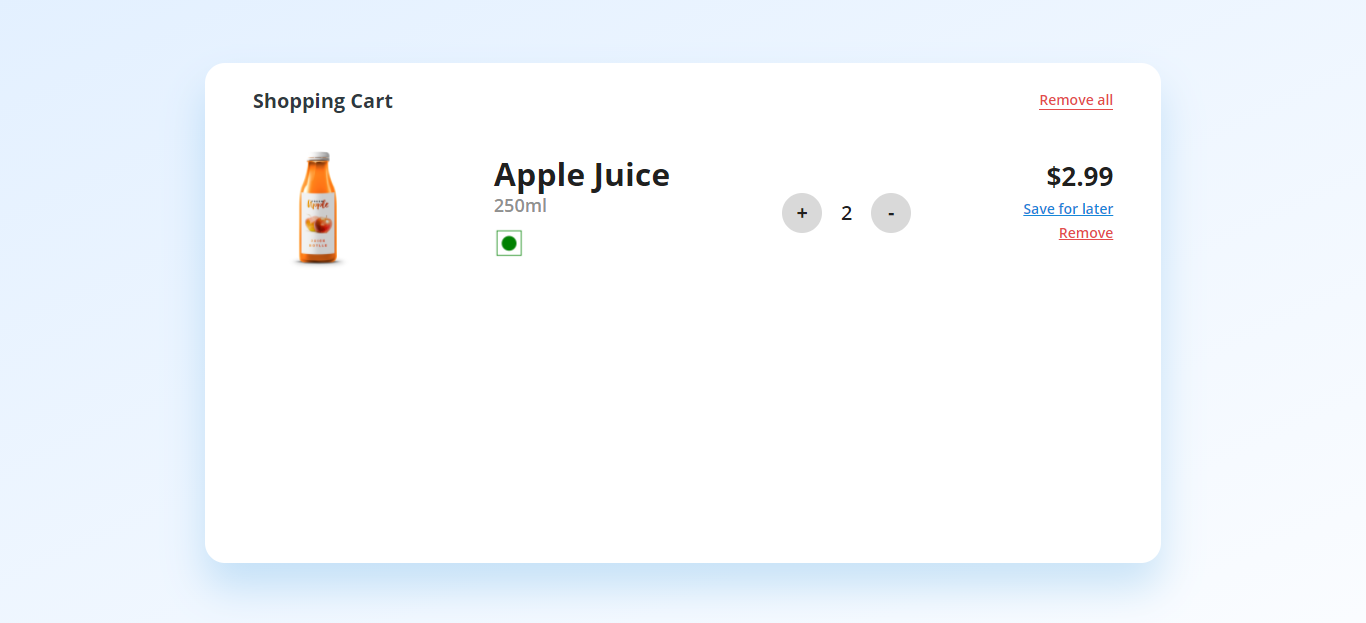
Step 5: Adding a price section
HTML:
            <div class="prices">
              <div class="amount">$2.99</div>
              <div class="save"><u>Save for later</u></div>
              <div class="remove"><u>Remove</u></div>
              </div>
CSS:
            .prices{
              height: 100%;
              text-align: right;
}
.amount{
              padding-top: 20px;
              font-size: 26px;
              font-family: 'Open Sans';
              font-weight: 800;
              color: #202020;
}
.save{
              padding-top: 5px;
              font-size: 14px;
              font-family: 'Open Sans';
              font-weight: 600;
              color: #1687d9;
              cursor: pointer;
}
.remove{
              padding-top: 5px;
              font-size: 14px;
              font-family: 'Open Sans';
              font-weight: 600;
              color: #E44C4C;
              cursor: pointer;
}
Preview:
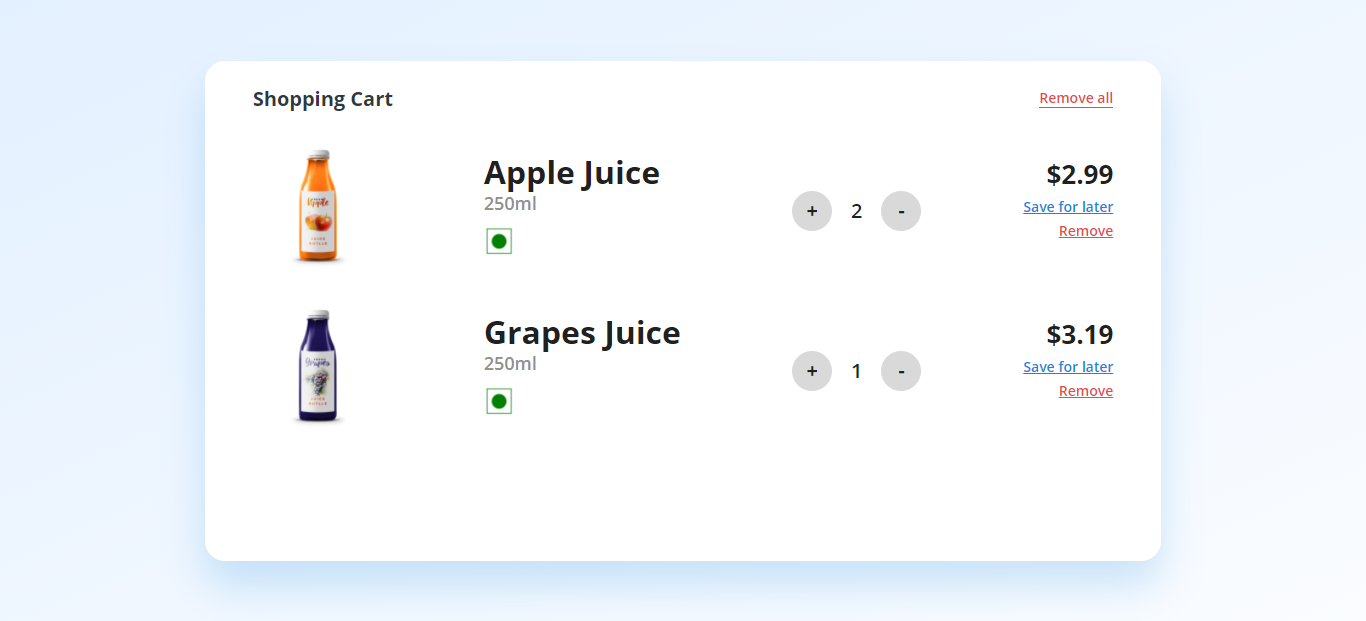
Step 6: Duplicate cart item
Follow the steps from 3 to 5 and add new details.
Step 7: Creating a checkout section
HTML:
            <hr>
              <div class="checkout">
              <div class="total">
              <div>
              <div class="Subtotal">Sub-Total</div>
              <div class="items">2 items</div>
              </div>
              <div class="total-amount">$6.18</div>
              </div>
              <button class="button">Checkout</button>
              </div>
CSS:
            hr{
              width: 66%;
              float: right;
              margin-right: 5%;
}
.checkout{
              float: right;
              margin-right: 5%;
              width: 28%;
}
.total{
              width: 100%;
              display: flex;
              justify-content: space-between;
}
.Subtotal{
              font-size: 22px;
              font-family: 'Open Sans';
              font-weight: 700;
              color: #202020;
}
.items{
              font-size: 16px;
              font-family: 'Open Sans';
              font-weight: 500;
              color: #909090;
              line-height: 10px;
}
.total-amount{
              font-size: 36px;
              font-family: 'Open Sans';
              font-weight: 900;
              color: #202020;
}
.button{
              margin-top: 5px;
              width: 100%;
              height: 40px;
              border: none;
              background: linear-gradient(to bottom right, #B8D7FF, #8EB7EB);
              border-radius: 20px;
              cursor: pointer;
              font-size: 16px;
              font-family: 'Open Sans';
              font-weight: 600;
              color: #202020;
}
Preview:
Wrap-up!
GitHub link for the same.
When choosing a shopping cart design, at least remember that people need control, freedom, and information. This is where users browse your product and actually decide what to buy. It depends on you. A simple solution!
How To Create A Shopping Cart Using Html
Source: https://uxplanet.org/how-to-create-a-shopping-cart-ui-using-html-css-e5db3cd55aa0
Posted by: axelsongairineyers.blogspot.com
Sees for paper an especially epic alliance, I staggered close by your blog other than execute up a bound report. I need your strategy for cutting... 토토사이트
ReplyDelete